SAP FICO TUTORIALS-
LSMW in SAP: Legacy System Migration Workbench Tutorial
Introduction-
✅ How to Create LSMW in SAP – Step-by-Step Guide :-
(LSMW)Legacy System Migration Workbench, is a helpful tool in SAP that simplifies the process of transferring data from old systems to SAP systems. It's like a digital translator that helps convert and import information accurately.In plain terms, when a company upgrades its software,LSMW ensures a smooth transition of data. It involves steps like choosing the right data transfer method, mapping data fields, and verifying the information for accuracy.LSMW simplifies the process of transferring data by providing a graphical user interface and a set of step-by-step procedures...
GO TO TCODE-LSMW
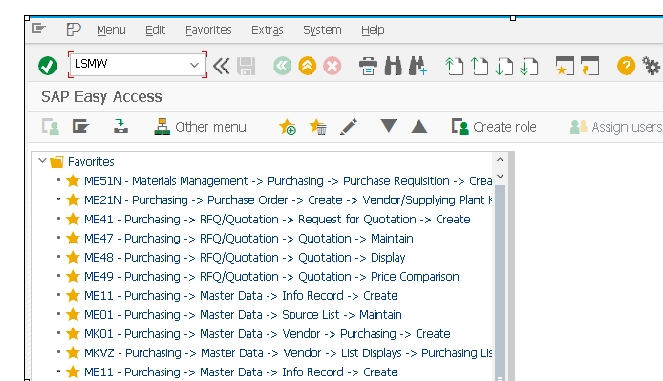
✅ Follow Path-
1)SAP LSMW: A Step-by-Step Guide in 14 Easy Steps
✅ 1)Project Definition-
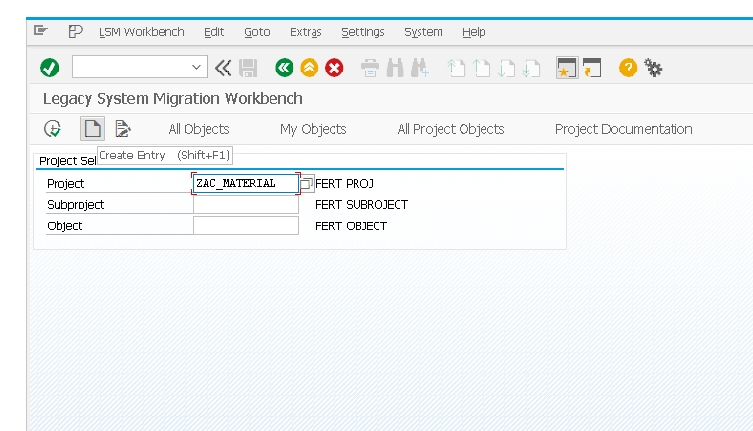
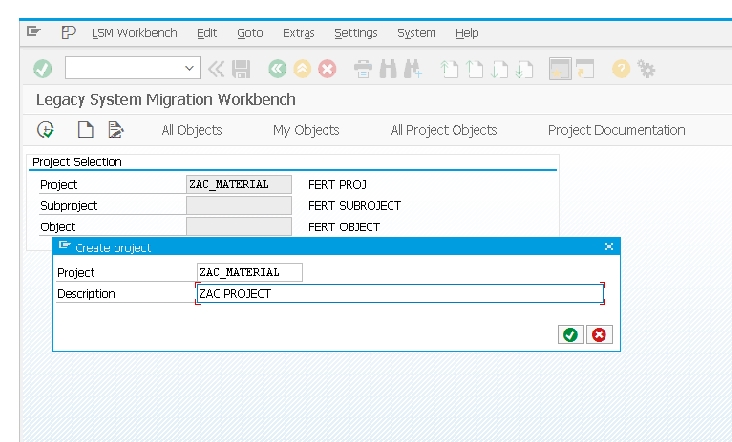
The first step in any data migration project is to define the scope and objectives.Identify the data to be migrated,the source system, and the target SAP system.Establish a clear project plan, including timelines and responsibilities.-
CREATE A PROJECT-TYPE PROJECT NAME THEN SELECT NEW ENTRY BUTTON-
✅ 2)Object Selection-
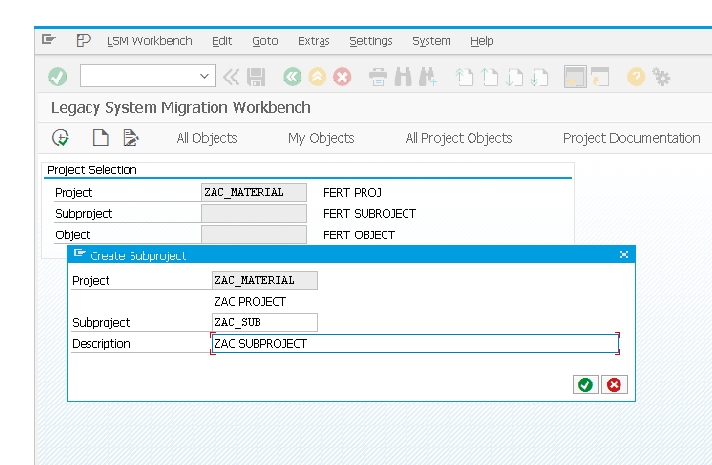
CREATE SUBPROJECT-
In this step, choose the relevant LSMW object for your data migration. Common objects include Direct Input, BAPI, and IDoc. Select the one that best suits your requirements and aligns with the data structure.
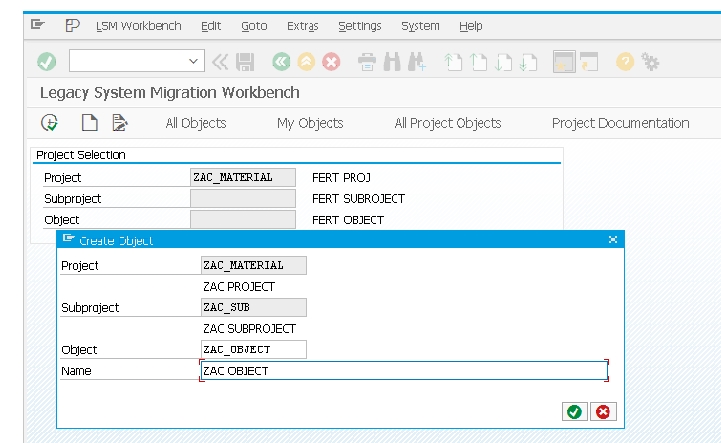
THEN CREATE OBJECT-
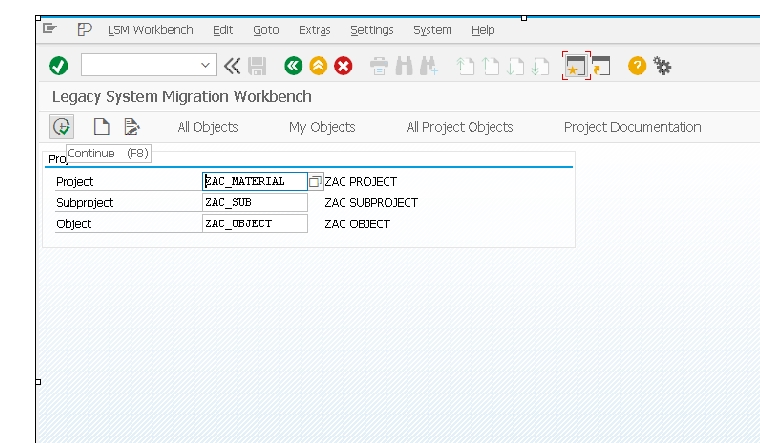
THEN CLICK ON CANTINUE BUTTON-
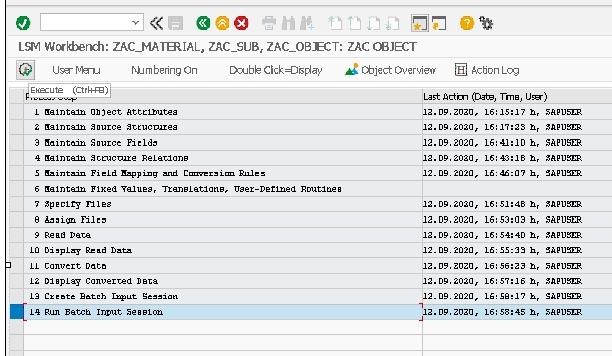
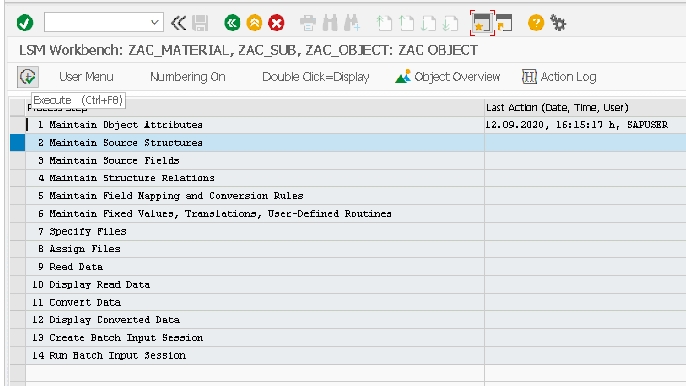
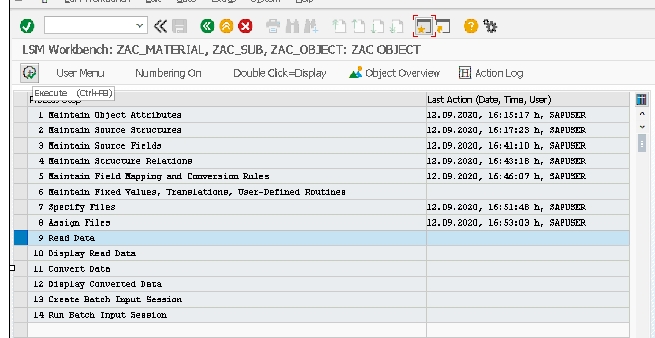
✅ 4)THEN FOLLOW 14 STEPS-
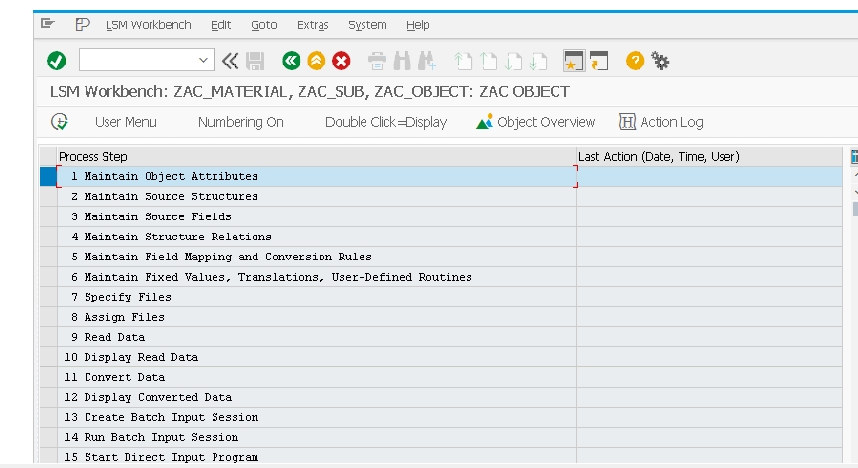
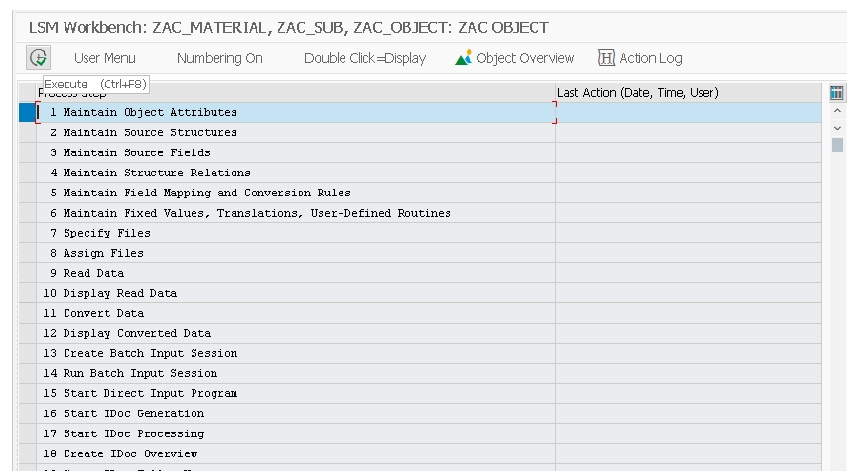
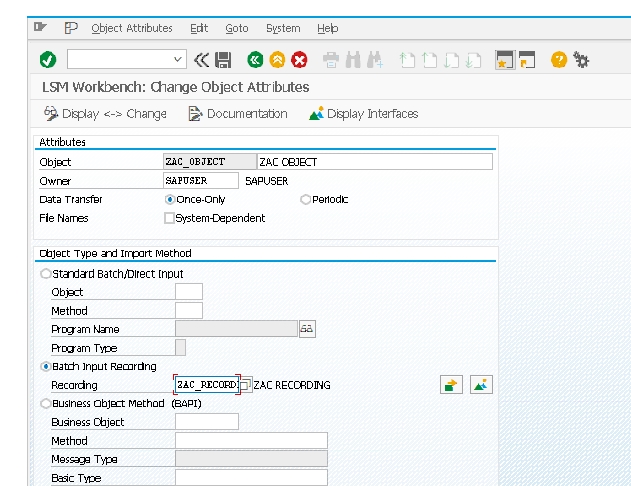
✅ 1)SELECT SIRST MAINTAIN OBJECT ATTRIBUTES-ZAC_OBJECT THEN CLICK ON EXICUTE BUTTON-
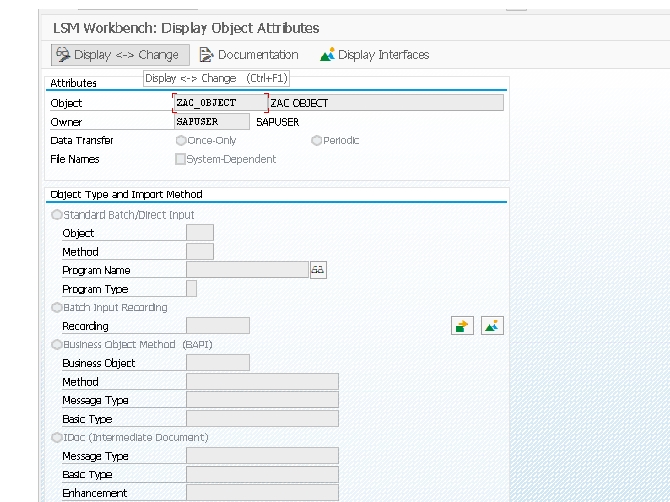
CLICK ON DISPLAY CHENGE BUTTON-
SELECT SECOND OPTION-2)BATCH INPUT RECORDING
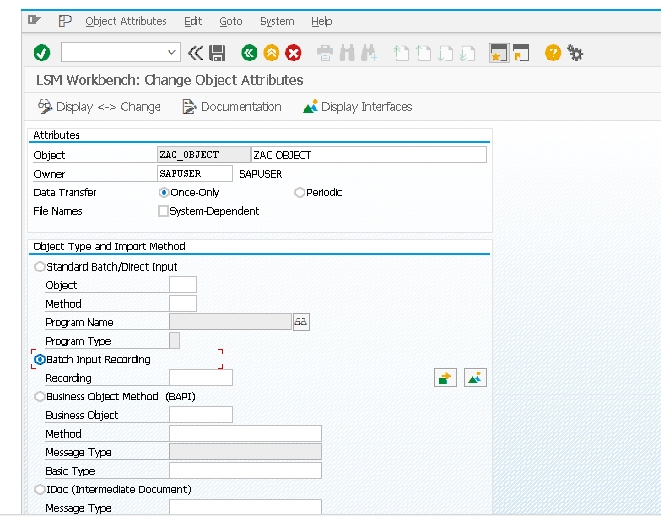
SELCET RECORDING OVERVIEW
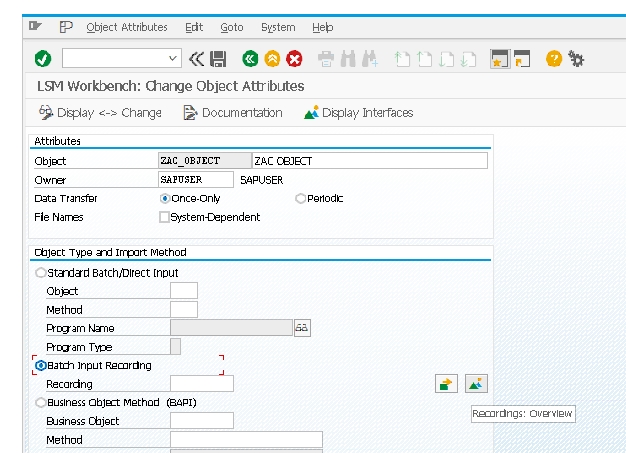
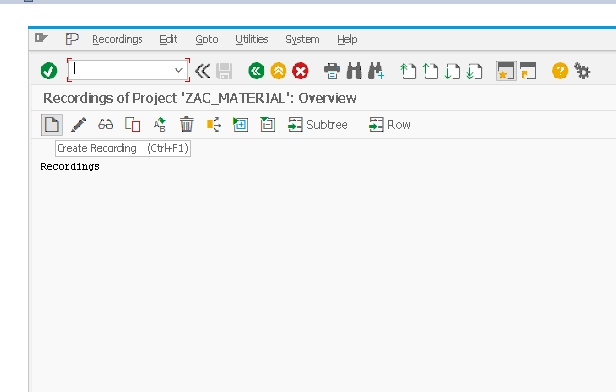
SELECT CREATE RECORDING BUTTON
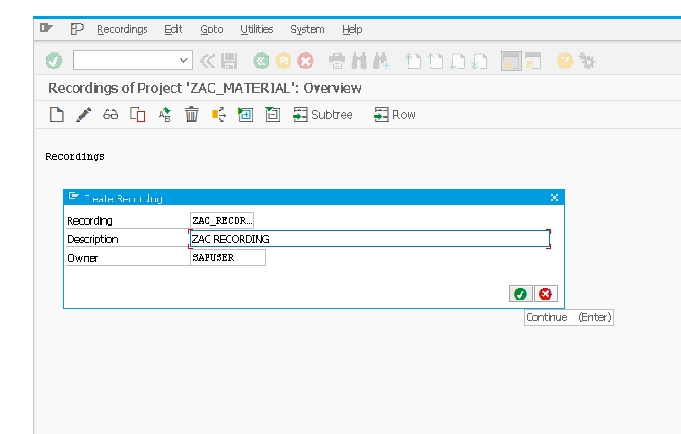
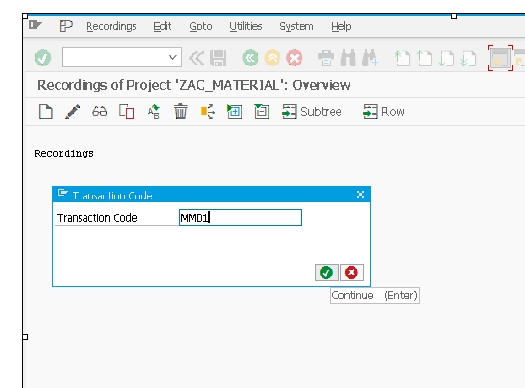
SELECT CREATE TRANSACTION CODE- EXAMPLE-MM01-
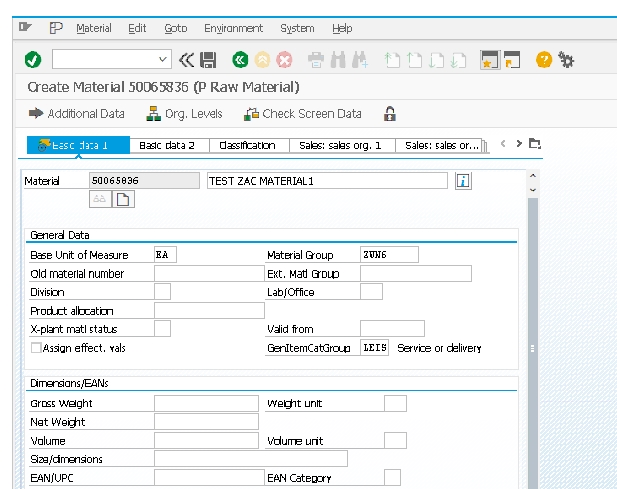
SELECT DEFALLT ALL BUTTON-
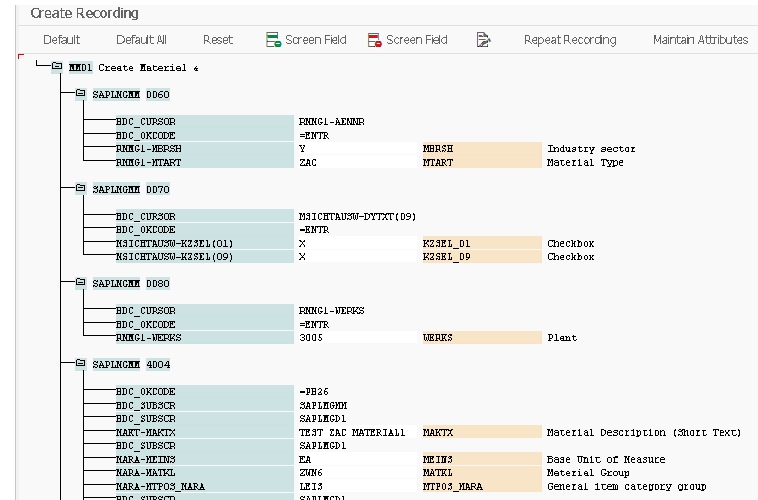
*)SELECT -SAVE
CLICK SIDE BUTTON
✅ 2)Maintain Source Structures-CLICK EXECUTE BUTTON
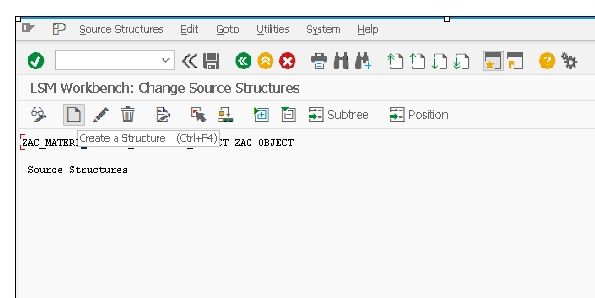
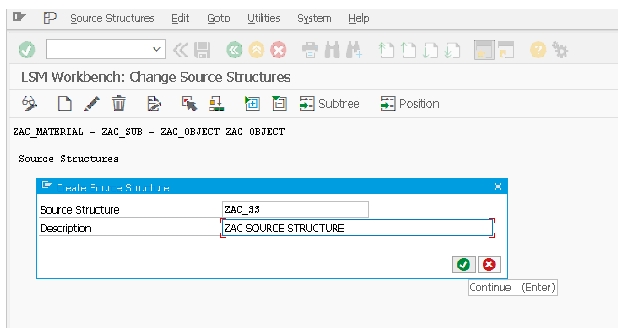
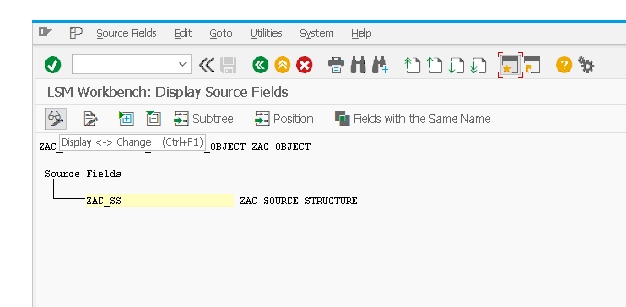
CLICK CREATE A STRUCTURE BUTTON- ZAC_SS
✅ 3)Maintain Source Fields-
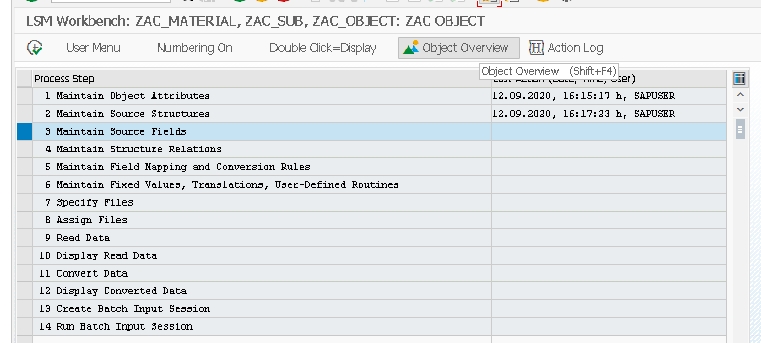
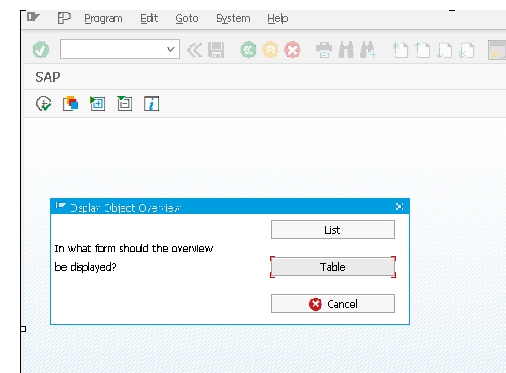
CLICK ON OBJECT OVERVIEW--SELECT TABLE
SELECT CTRL AND Y BUTTON -SELCT TABLE AND COPY IN EXCEL FORMAT-
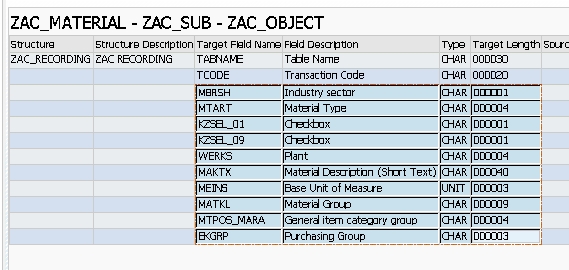
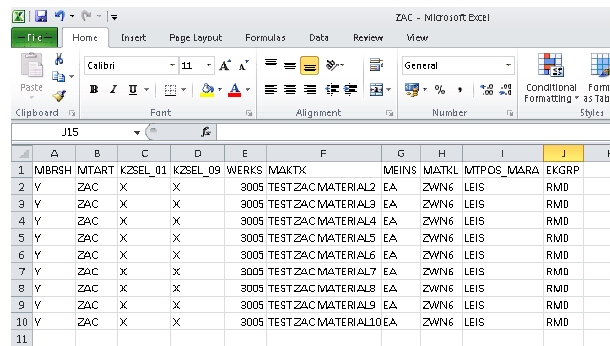
CLICK CHENGE BUTTON-
THEN CLICK ON TABLE MAINTAINCE-
GO TO EXCEL SELECT SOURCE DATA AND COPY-
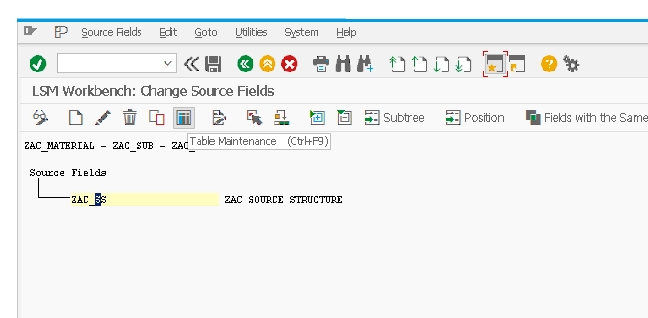
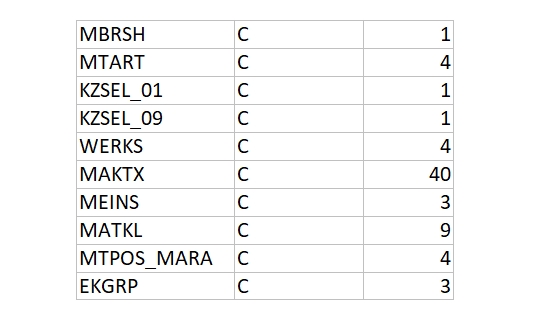
and Paste THIS-
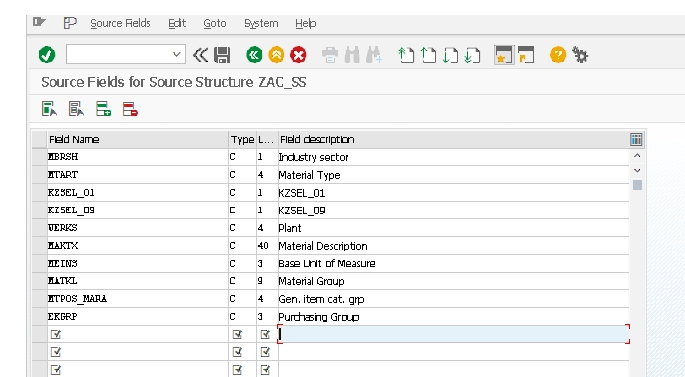
SAVE-
✅ 4) Maintain Structure Relations-
SELECT RELATION SHIP AND SAVE-
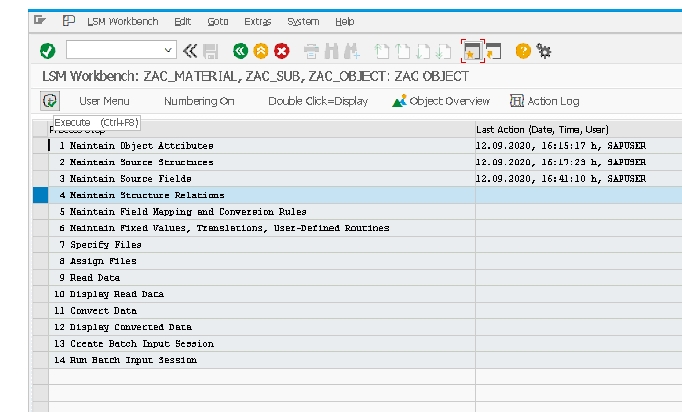
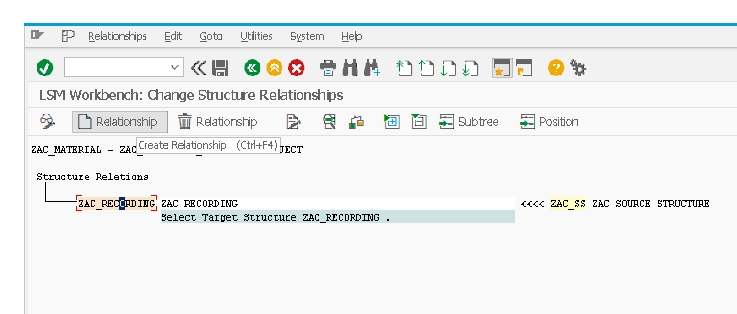
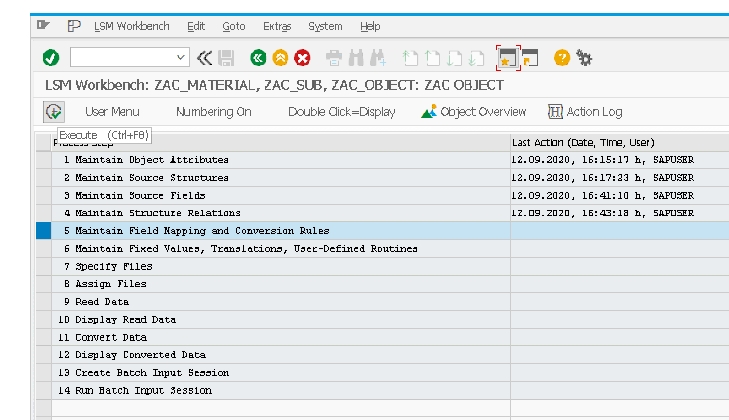
✅ 5)Maintain Field Mapping and Conversion Rules-
5)SELECT-EXECUTE AND SELECT CHANGE BUTTON
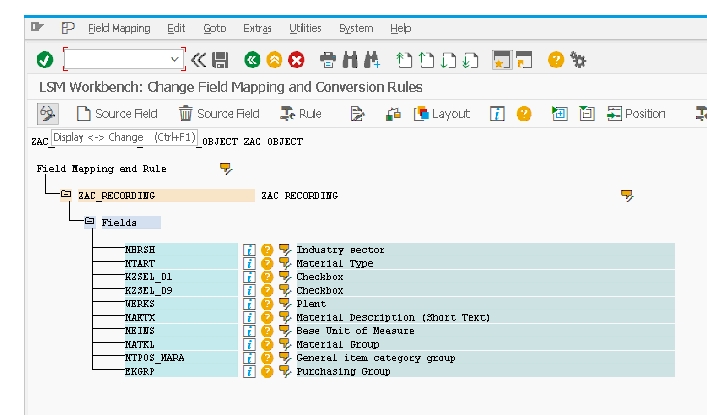
GO TO CHANGE MODE SELECT ON EXTERA TAB-AUTO FIELD MAPING
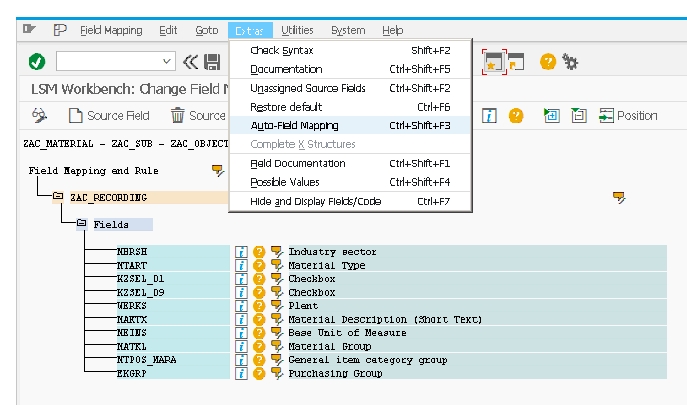
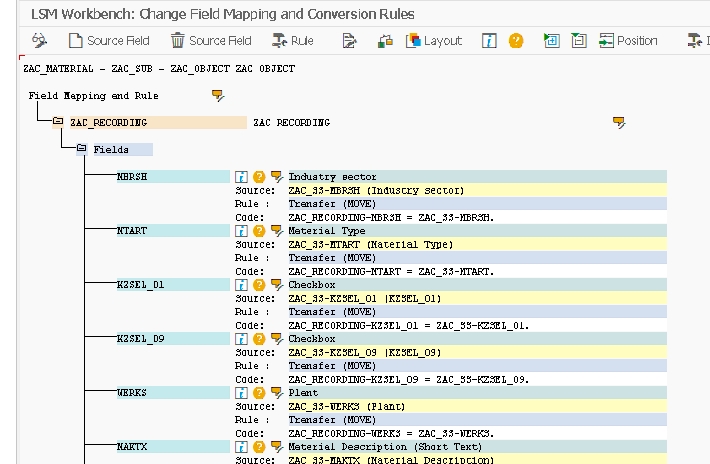
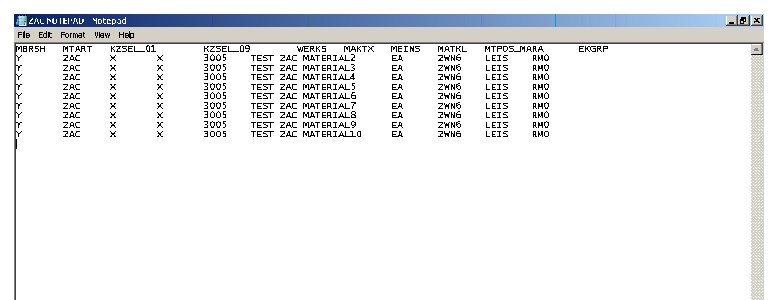
NEXT-COPY UPLOADING DATA-
AND PASE IN NOTEPAD

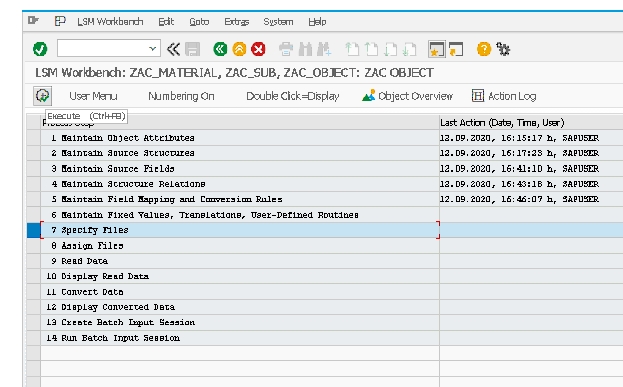
✅ 7)Specify Files-
SELECT-EXECUTE AND CHANGE MODE-
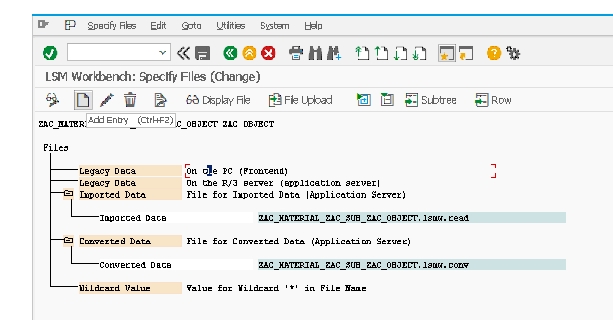
CLICK ON LEGECY DATA FILE-SELCET FILE-
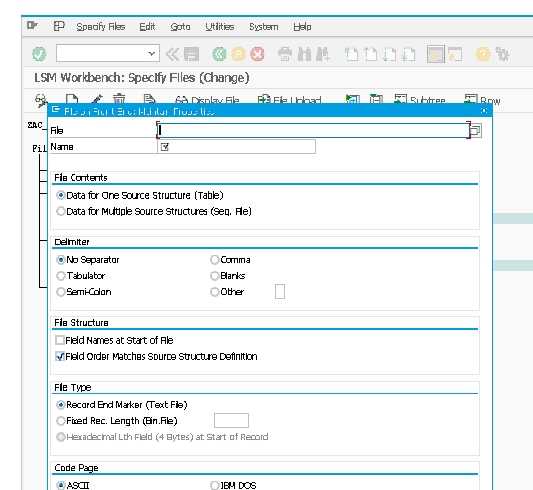
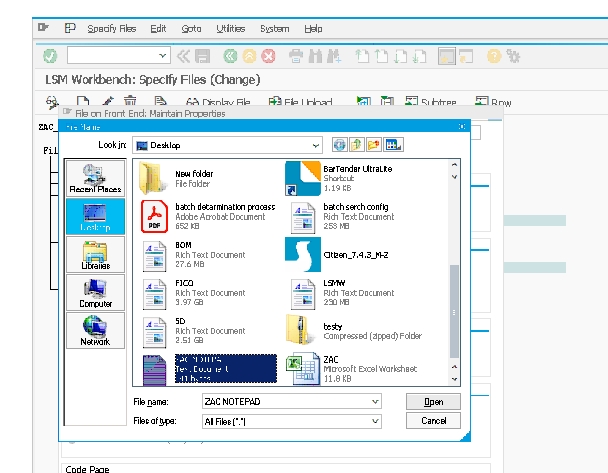
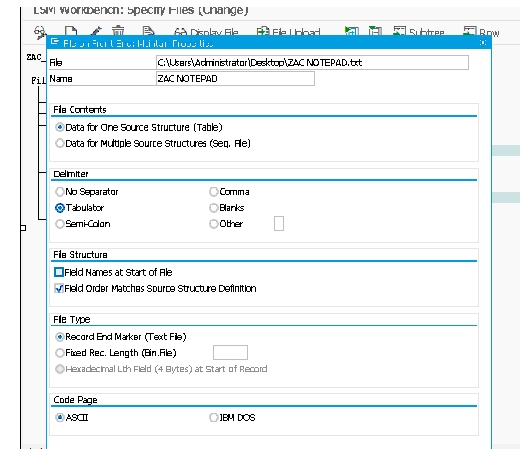
SAVE AND SELCT TABULATOR OPTINO-
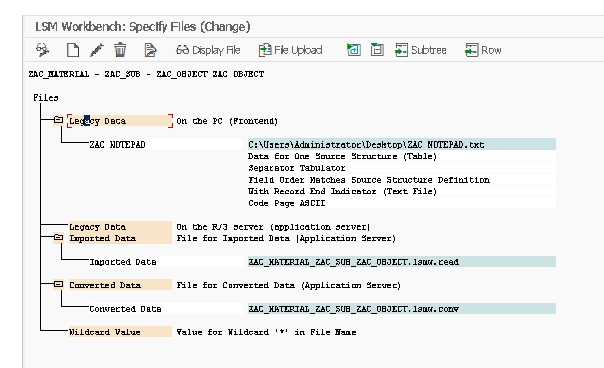
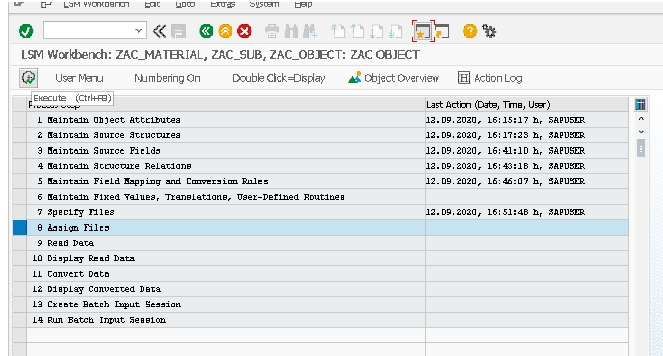
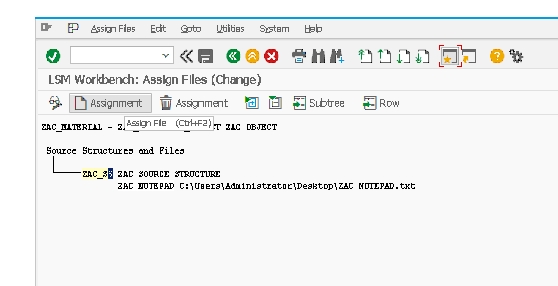
✅ 8)Assign Files-
SELECT ASSIGNMENT-
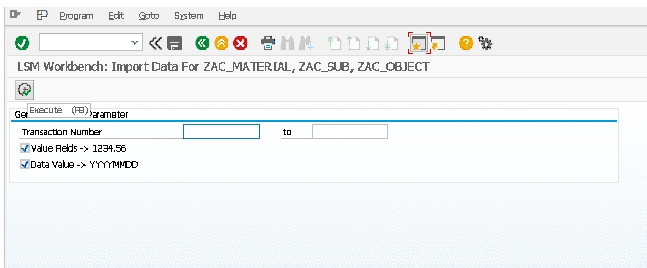
✅ 9)Read Data-
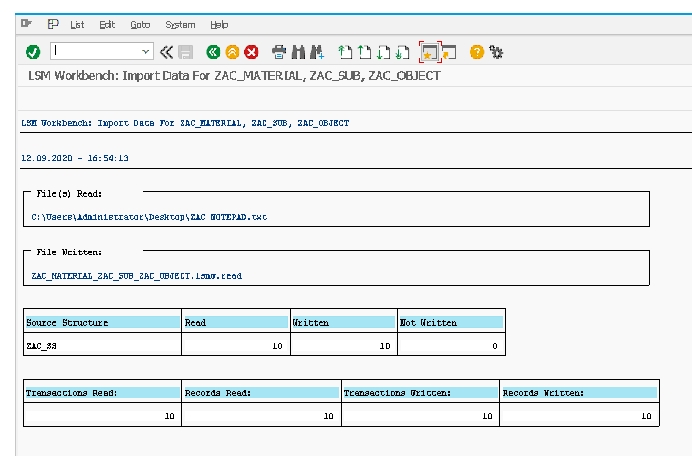
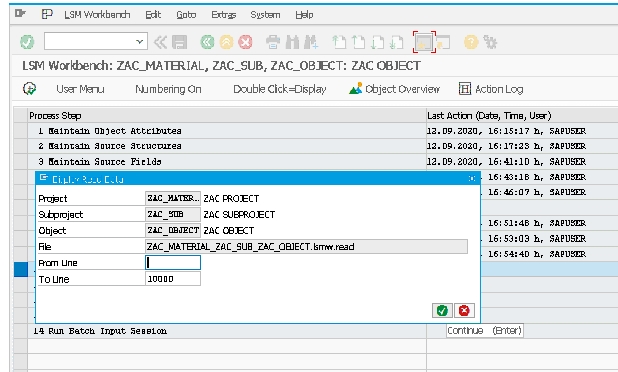
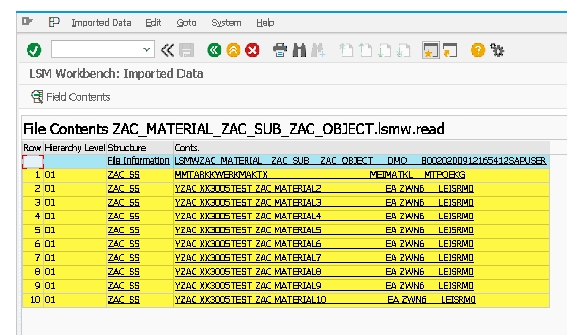
✅ 10) Display Read Data-
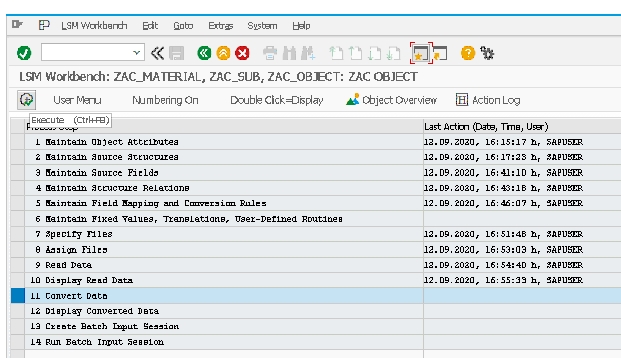
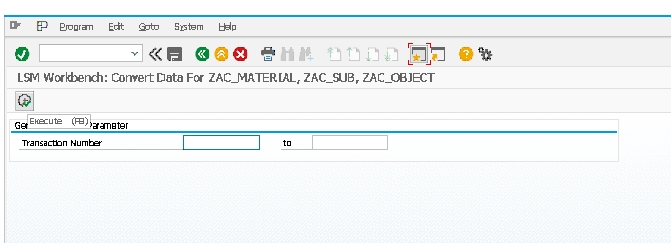
✅ 11) Convert Data-
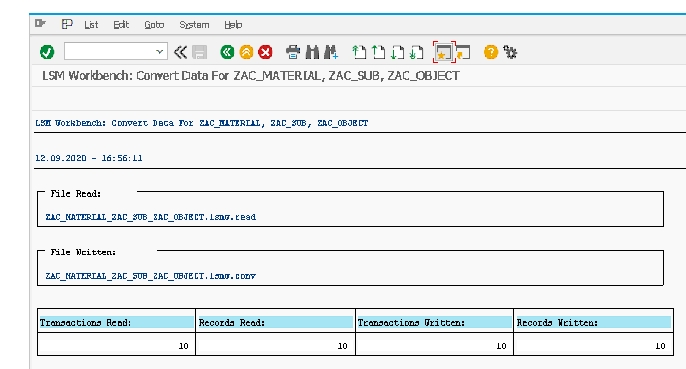
✅ 12)Display Converted Data-
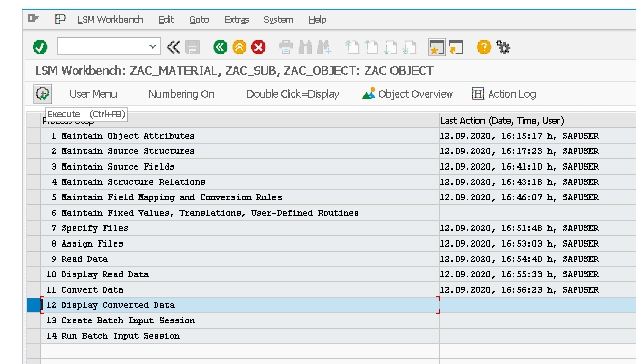
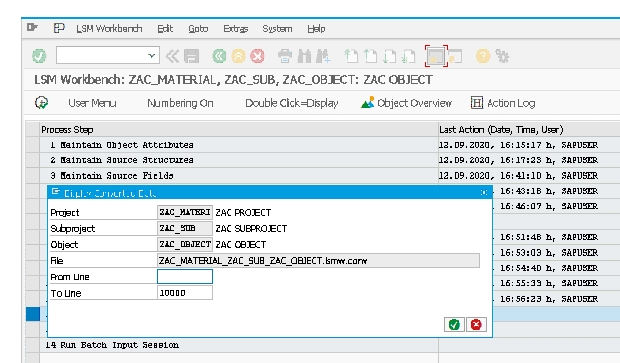
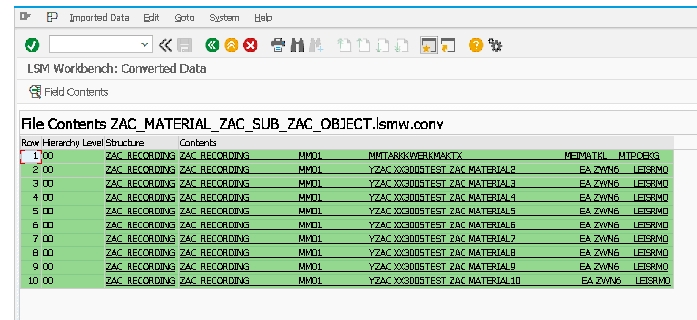
✅ 13)Create Batch Input Session-
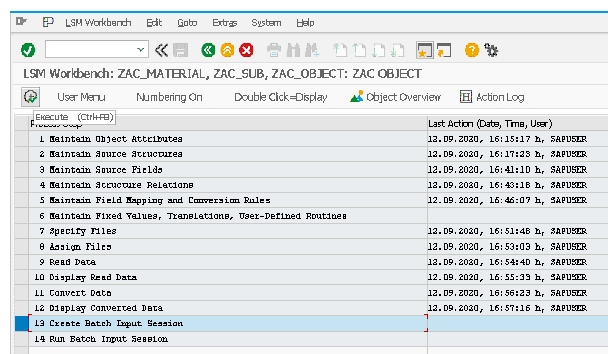
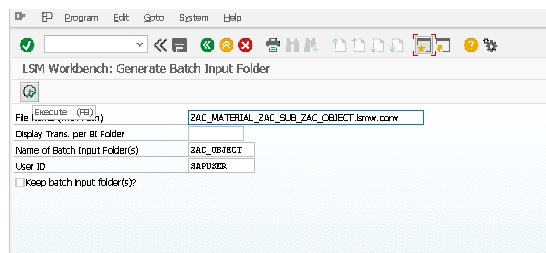
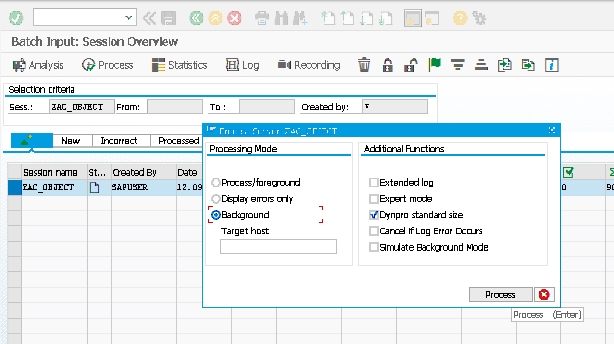
✅ 14)Run Batch Input Session-
SELECT LINE -THEN SELECT PROCESS-SELECT BACKGRAUND-SELECT DYNOPRO STANDRED SIZE-THEN SELECT-PROCESS
